
It’s DIY FRI. again, where every week I try to post something you can do yourself rather than buy, which is a money saver, and can be VERY REWARDING. Some of these posts are crafts, sewing projects, homemade cleaners, homemade health aids, tutorials, and the like.
With school coming soon or already here for some, it’s time to start thinking of back-to-school supplies and the like. To save money and give my kids more nourishing food, I make their lunches. When my Ellie girl first started kindergarten two years ago, I knew I needed something to carry her lunches to school. This (the above image) ended up being my first re-purposing project two years ago, and after that, I became addicted to purposefully creating from the seemingly, uncreateable (my word). The lunch bags are still in great shape after two years and many washes!
For those first two lunch bags, I used material from my old double jogger stroller. Yes, that is what I said: jogger stroller.
Scroll down a couple of paragraphs to get to the tutorial if you don’t want the story.
I was out on our local trail with a friend, her daughter and my three kids before school started two years ago. When we were done I tried to collapse my stroller, and SNAP! Something had happened in the internal mechanism.
 After JSarr spent a frustrating hour trying to repair the faulty mechanism three times, unsuccessfully, with duct tape, I contacted the company from which I bought the stroller, and they directed me to the manufacturer. I just wanted to buy the part to replace the mechanism. When I called they said that the jogger might be under a five-year warranty. I have already had the stroller for over three and a half years, and in that time, it’s gotten nearly daily use. They asked me to e-mail a pic and a copy of the receipt, and they verified that the stroller, indeed, was under warranty. “Just send us a picture of the stroller destroyed, and when we get it, we’ll send you a new stroller,” they said. I was thrilled. THRILLED!!! I did feel VERY strange about Jonathan SAWING the jogger into pieces before I actually had the new stroller in hand, though.
 So less than a week later I had a BRAND new upgraded double jogger!
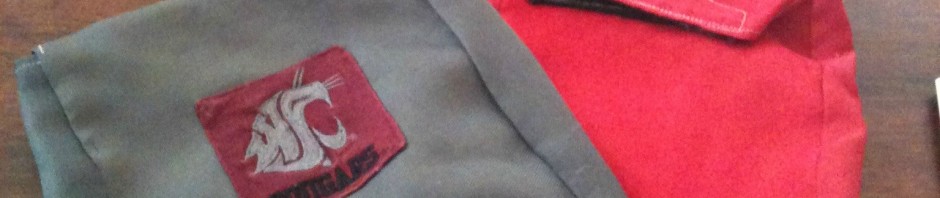
I felt like I couldn’t waste all this good material from the jogger. As I had taken up sewing in six months before the event, and with Ellie starting school, I thought, ‘I’ll make her a lunch bag!’ I took the canvas and velcro from the jogger and made 2 lunch bags! I feel like Fraulein Maria from The Sound of Music making play clothes out of old curtains. Now I can look back with fondness at the lunch bags with all those memories embedded in them. I also used a patch from an old pair of shorts to add some nice WSU Cougar decor to one of my lunch bags. Go Cougs!!
I was also able to salvage all this great velcro from the jogger, and 2 1/2 years later, I still have some velcro left over. I have used the velcro to make my re-purposed/reusable snack bags and other crafts. It’s gone a long way!
For this particular lunch bag I am showing you, I used material that came from a broken lawn chair, velcro from my defunct jogger stroller, and new thread. I did make this one today for my husband as a back-to-school gift for him becoming the headmaster at Evangel Classical School. I made this tutorial easier to make than my first lunch bags pictured first, since these don’t have side panels. I plan to post that later.
Look around your home, and see if you can breathe new life into old items like an old coat or gym bag. I wanted some material that would be easy to wipe down, so all of those kinds of materials would work. I have made bags from backpacks, too. I am sure you could use cotton or flannel, but it just wouldn’t be very durable or easy to wipe down. It would wash easily, though.
Easy Lunch Bag Tutorial
What You Will Need:
- Material (approximately 2 feet, depending on the size of lunch bag you want)
- optional lunch bag/brown paper bag, as a model for size
- Velcro (approximately 3-6 inches, but you decide)
- thread


This tutorial does not give side panels like my first lunch bags did. This is just a get-it-done-super fast tutorial. The side panels aren’t actually that hard to add. I will post that later. This particular bag is good for holding sandwiches and more.

FYI: When you are working with a tough material, you may need to use a different needle, thread, or change the tension. I had to change my thread and tension to get the ball rolling.
I hope that wasn’t too confusing. It is easy to make. Please e-mail or comment with questions.
Do you need some re-purposed Snack Bags to go with your lunch bag??

We would love to hear from you! Feel free to comment. Get free e-mail updates by subscribing here. Follow us on Facebook and Twitter. “Moreover, it is required of stewards that they be found faithful” (1 Corinthians 4:2 ESV). Thanks for visiting!
Sonja
That is such a good idea!
I love it! Thank you so much for posting on Saturday Show and Tell. I hope you’ll be back this week to link up some more great ideas! Have a great rest of the week! -Mackenzie http://www.cheeriosandlattes.com
Wow, you are so clever! I honestly would never have thought to use the fabric from a stroller to make something useful. Thanks for linking up at Thrifty Thursday, hope to see you again this week!
Wow a clever idea you came up with and a great way to up-cycle! Great reuse of material and it came out great! Thanks for sharing your creative inspiration with Sunday’s Best – you helped make the party a success!
What a great idea!! Awesome repurposing!!
would love if you could share this on my link party
Natasha xx
Great reuse of materials! Great idea and looks fab too! Jules
This is such a great idea. Especially with back to school. I bet you could make it out of an old back pack.
This is a great repurposed idea and something I need as my first goes to kindergarten!
Super clever idea…I love it.