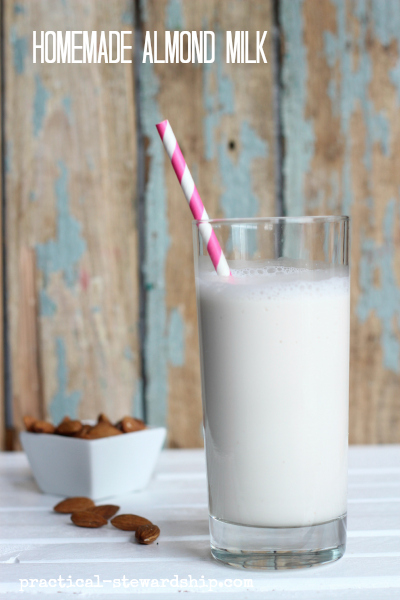
Have any of you ever made homemade almond milk? Well if you have never made almond milk before, I’m here to tell you that it’s really so easy to make. Plus, you get to know what’s going in your food. I have had it on my mental to-dos for a few years now, and I finally started making it at the beginning of this year. I don’t know what was my road block, because I knew it was really easy to make. Sometimes you just gotta put your mind to it, and do it!

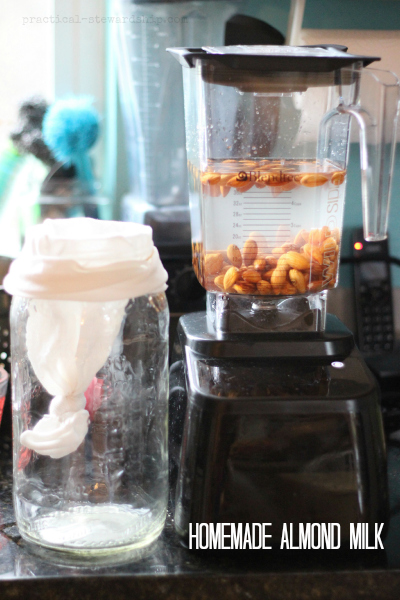
This recipe isn’t intended to blow your mind away. There are plenty of recipes on the Internet for homemade almond milk that might do just that, but what I really wanted to show you was what we use for the nut milk bag. You see, I actually intended to buy a nut milk bag. I had used cheesecloth before, but it’s so flimsy and can leave residual strings, so I wanted something more sturdy. After having a hard time finding a nut milk bag in stores (our local co-op was out), I ended up using some drain sleeve filter fabric sock
that Jonathan had leftover from a French drain project he had. Score!!! It was the perfect item to re-purpose into a nut milk bag! I just tied a simple knot on one end of my homemade “nut milk bag”, and I rubber banded the other side to a big ol’ Vlasics Pickle Jar as shown below. I like how much room the jar gives for the bag to hang even if I don’t fill the whole jar with almond milk. And seriously, we have enough drain sleeve filter fabric that we could easily make five more nut bags (so if you are one of my local friends, and want one, ask me for a free nut milk bag:).

We use almond milk ALL. OF. THE. TIME. We are not anti-dairy by any means. I am primarily dairy-free (I’ll have a little butter or real whipped cream occasionally and eat raw milk cheese since it’s less processed), and one of my daughters is experimenting with being dairy-free right now. I have relied on shelf-stable boxed almond and coconut milk for a few years now, and knew I needed to try and make my own almond milk.
I especially knew after talking with my friend around New Year’s about the potential harmful affects of carrageenan (the ingredient often used to thicken store-bought almond and coconut milks) such as inflammation and cancer that I needed to finally dive in and make my own homemade almond milk. It was that conversation that finally propelled me to just do it. Why did I wait so long? Was I waiting to get a nut milk bag?? Anyway, I am so glad I finally made it. It’s so easy to make that I haven’t purchased store-bought non-dairy milk since I began making it (I have considered buying it for those “in-a-pinch” times, though).
This recipe is as simple as it gets. Just two ingredients. When you buy almond milk at the store it usually has more than five ingredients. I can understand adding a little vanilla or salt. But it’s really nice to know that we are really only dealing with two main ingredients. Since I don’t drink the milk straight and only use it in cereals, granolas and in baking waffles, pancakes or other goods, I don’t add extra ingredients to the almond milk, but feel free to add a dash of salt or vanilla if you wish.
 This recipe works great with a high powered blender like a Vitamix or Blendtec. I don’t know how well it would work in a conventional blender, but it’s worth a shot. Leave a comment and let me know how it turns out if you try it in a regular blender, please:). If you don’t have a high powered blender and if you’ve ever considered buying one, you may want to check out this post called Do You Really Need a High-Powered Blender?
**Note on almond pulp: When you are done making almond milk, you are left with almond pulp. It freezes easily. I keep it in the fridge, and I’ll add a scoop or two of it to smoothies. You can use it in your oatmeal, as well. I have tried to make “almond flour” with it by baking it, but that was a disaster. I will try a different recipe again (that I am unable to locate now). My Abbie girl loves it plain, though I think the pulp has absolutely no flavor. I am excited to try these almond pulp bars from Good Girl Gone Green this summer.
**Note on how much water to blend: I have seen recipes for almond milk using anywhere from 2-8 cups of water with only 1 cup of almonds. Depending how frugal you want to get, you can really stretch your dollar here, especially if it’s just for baking. I typically use 4-5 cups of water, although I may start to add more water.
**Note on cost: At Costco you can get a bag of “raw” almonds (they aren’t truly raw, but that’s another story) for about $15.69/3 lbs. which contains about 9 cups of almonds (check out our Costco Grocery Price List here of 150 items). That means you can make 9 batches of almond milk with one Costco bag of almonds. Let’s say you yield 32 ounces of almond milk each batch, that would cost you about $1.74/32 ounce batch. If you use more water, it will be even cheaper, decreasing your cost to $.87/32 ounces if you use 8 cups of water.
Homemade Almond Milk
Ingredients
- 1 cup of almonds soaked in water overnight up to 24 hours and rinsed (sometimes I'll only soak for an hour in a pinch)
- 4 cups filtered water
Instructions
-
Blend all ingredients together until almonds are pulverized.
-
Strain, and refrigerate for up to four days.
-
The almond milk will separate in the fridge. Just shake and use.
-
See note above to see almond pulp uses.
Do you have a favorite recipe where you use almond milk? Have you ever made your own almond milk? What do you do with the almond pulp?
Seriously, I thought this would be one of the shortest posts I’ve ever written, but it ended up being one of the longest food posts here, probably because it’s so foundational for us in the kitchen. I guess I had a lot to say about almond milk. How funny. Congrats if you made it to the end!

I use my Cuisinart blender and it works great! After squeezing the pulp free of milk I dry it in my dehydrator overnight till it is crispy dry on the but setting about 95 degrees because nuts are high in oil and use the tray with the solid sheet used for liquid items like fruit purée for fruit leather. Afterwards I put it in my KitchenAid coffee grinder with the removable stainless bowl for easy cleaning but any coffee grinder will probably work but I never grind coffee beans in it, just nuts and herbs, and grind it to make my own almond meal. Careful not to over grind as the pulp can heat up and you could have a gummy mess. The grinder isn’t powerful enough to make it into butter (and you need the whole un-milked nut for that). Keeps great in glass jars several months after dehydrated.
I wish I had a dehydrator. Someday…I love that you are using all parts of the almonds. Thank you for sharing!!
I got 5 fine mesh bags from a natural foods store for about $5 (4 neatly rolled up mesh bags are sold packaged in a 5th). Meant to replace plastic bags when buying produce, they also make great nutsmilk bags, and they are easy to clean. The bags are fine enough to replace cheesecloth in making homemade butter and cheeses, but much more sturdy.
AND, for even more multitasking, when I make zucchini or other wet veggie to make patties, I salt the veggie, let it sweat for a bit, rinse it and squeeze the water out in my mesh bags. Best $5 I ever spent!
Thanks for sharing about your fine mesh bags! Also, what a great idea about making your patties! Thank you for visiting!
We just started to make almond milk at our house. We use our regular blender and it seems to work fine. It’s a Hamilton Beach. I add a dash of salt and a little gluten free vanilla. Its way better than what can be bought in the market. Thanks for the ideas on left over almond meal.
Hi Nancy. Oh, so good to know about your Hamilton Beach Blender. I totally agree about it being way better than what you get at the market. Thanks for sharing!!!
This is pretty good! I use a lot of almond milk but have not gotten around to making it myself. And love the idea of the drain filter fabric.
Hi Maria. Glad you like the idea! Just do it!. It’s really so easy to make almond milk. I haven’t looked back since!